


Wire a 7 Pin Trailer Wiring Harness in 60–90 Minutes With SAE Pinouts
A standard 7 pin trailer wiring connector carries seven separate circuits: ground, tail/running lights, left turn/brake, right turn/brake, an electric brake controller signal, a 12V auxiliary feed, and a battery charge or backup line. Color coding for these wires shifts between manufacturers, so match wires by function with a test light, not by color alone. Most failures trace back to two weak points: a bad ground connection and a brake circuit with no breaker protecting it.
TL;DR:
- The seven circuits in a 7-pin trailer connector include ground, tail lights, turn signals, brake, electric brake signal, auxiliary power, and battery backup, with wiring colors varying by manufacturer.
- Standard wiring standards are governed by SAE J560, J2863, and J1239, which often differ in color codes and pin arrangements, making testing essential before splicing.
- Proper wiring requires a dedicated ground, a breaker for the brake circuit, and correct gauge wire (preferably copper) to prevent failures during heavy use or extreme conditions.
- Using high-quality, DOT and SAE-compliant cables like 14 AWG ensures durability and safe operation, especially under conditions like salted winter roads.
- Regular testing of circuits before sealing connections helps prevent faults such as faulty brakes or flickering lights, saving time and enhancing safety.
Table of Contents
- How Do You Read a 7 Pin Trailer Wiring Diagram?
- Which SAE Standards Govern 7-Way Trailer Wiring?
- How Do You Wire a New 7 Pin Trailer Connector Step by Step?
- Why Are My Trailer Lights Not Working After Wiring?
- What Wire Gauge and Circuit Protection Does 7-Pin Wiring Need?
- Which Allstartruckparts Products Fit This Job?
- A Publisher’s Perspective on Wiring Safety
- Get the Right Parts for Your 7-Way Build
- Sources
- FAQ
How Do You Read a 7 Pin Trailer Wiring Diagram?
Both major connector shapes, the round pin-style plug and the flat RV blade connector, carry the same seven circuits, but the pin layout differs between them, and orientation matters. Look at the connector face on: for the round 7-way, pins sit in a circle around a center pin; for the RV blade, pins run in a flat row. Viewing the plug from the front gives you the mirror image of what you’d see wiring the socket from behind, which is where a lot of installers cross wires without realizing it.
Here’s how the functions typically map to pin position and gauge, based on the 7-way trailer plug pinout and Curt’s towing wiring diagrams:
A few things worth flagging before you trust any color at face value:
- Some RV-blade harnesses swap blue and black for auxiliary versus brakes depending on the manufacturer.
- Aftermarket harnesses occasionally use red for ground instead of white, which trips up even experienced installers.
- If a wire’s color doesn’t match what you expect, confirm the actual function with a circuit tester before you cut or splice anything.
Which SAE Standards Govern 7-Way Trailer Wiring?
Three SAE documents shape how 7-way and related trailer connectors get built and colored. SAE J560 covers the 7-pin round connector geometry used on heavy trucks and larger trailers. SAE J2863 standardizes the flat blade connector now common on RVs and pickups, and it’s the reason “SAE blade” wiring sometimes differs from older “RV-traditional” color schemes on the same pin count. SAE J1239 governs the older 4-pin flat connector and documents the cable gauge and insulation requirements that carried over into later trailer wiring practices.
That overlap between standards is exactly why color alone will eventually burn you:
- RV-traditional 7-way wiring often puts auxiliary power on black and electric brakes on blue.
- SAE J2863 blade connectors sometimes reverse that pairing depending on the harness manufacturer.
- Round SAE J560 connectors used on semi trailers follow yet another convention tied to commercial trucking practice.
Two wires are non-negotiable no matter which standard you’re working with: ground and the electric brake signal. Multiple wiring guides agree these two circuits stay consistent in function across nearly every 7-way variant, even when color assignments shift. Test before you splice, every time.
How Do You Wire a New 7 Pin Trailer Connector Step by Step?
Tools and materials you’ll need:
- Digital multimeter or a simple test light
- Heat-shrink butt connectors (not the cheap crimp-only kind)
- Wire matching the gauges in the table above
- In-line breakers rated for the brake and auxiliary circuits
- Dielectric grease for every terminal
- Wire strippers, a heat gun or lighter for shrink tubing, and electrical tape as backup
The wiring sequence, pin by pin:
- Mount the new socket or plug housing securely to the bumper, hitch, or vehicle frame before running any wire.
- Run a dedicated ground wire straight to a clean chassis point or the battery negative terminal. Skipping this step and daisy-chaining ground off another circuit is the single biggest cause of intermittent lighting problems.
- Connect the blue brake wire to your brake controller output, routing it through an in-line breaker rated for your trailer’s brake load.
- Splice the brown tail/running wire and the green and yellow turn/brake wires into your vehicle’s existing lighting harness using heat-shrink butt connectors.
- Route the auxiliary and battery charge lines to a fused feed off the battery, sized for whatever you’re powering (a converter, a winch, or interior lights).
- Secure every run with zip ties or clips, keeping wire away from the exhaust, moving suspension parts, and sharp frame edges.
- Seal every connector with heat-shrink tubing and dielectric grease before you close up the housing.
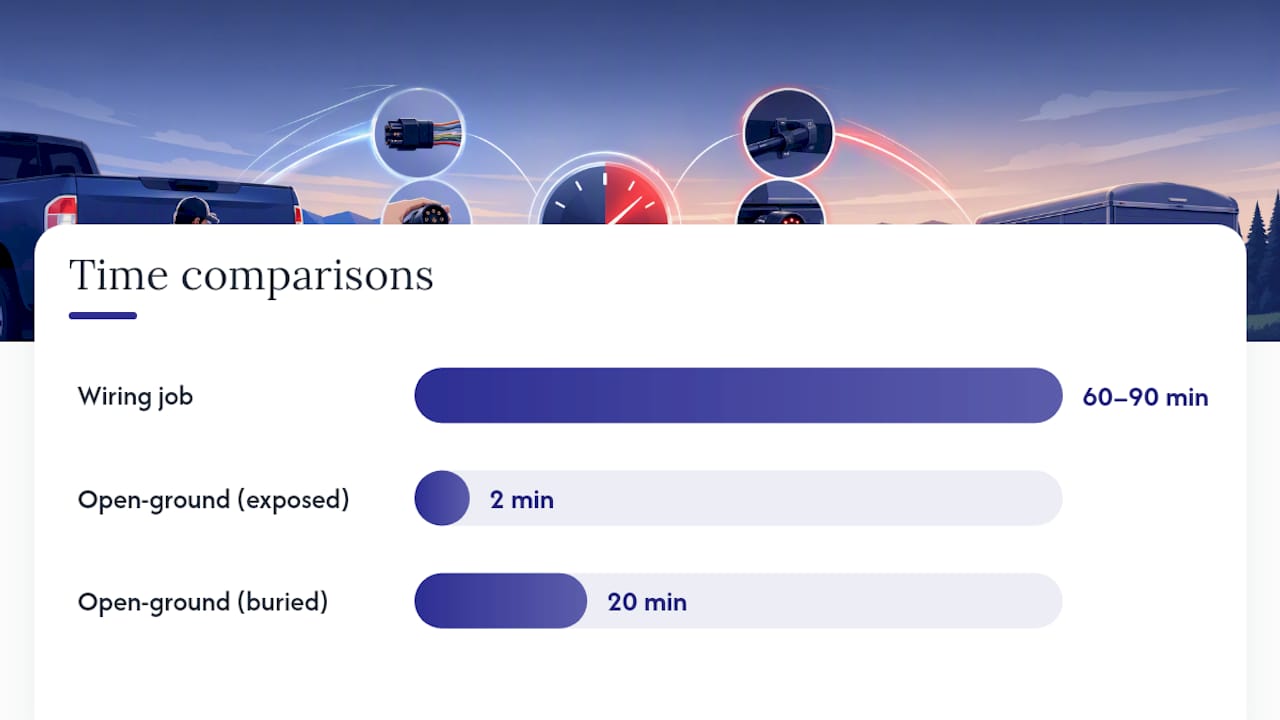
Sizing your breaker matters here: an under-sized breaker trips constantly and an oversized one won’t protect the wire at all, so match the breaker rating to the gauge you ran, not just to what fits in the fuse box. With an existing vehicle harness already in place, this whole job typically runs 60 to 90 minutes.
Pro Tip: *Test every circuit with your multimeter or a test light before you seal a single connector. Fixing an open ground takes two minutes when the wire is still exposed. It takes twenty once it’s buried in heat-shrink and tucked behind the bumper.
Why Are My Trailer Lights Not Working After Wiring?
Trailer brakes that won’t engage almost always point to the blue wire circuit or its breaker. Test resistance on the blue wire from the plug back to the controller, then check whether the breaker tripped or failed outright.
Running lights or turn signals that flicker or don’t light up usually mean a ground problem, not a bad bulb. Ground faults account for the majority of intermittent trailer wiring complaints, and they’re often the easiest fix once you know where to look.
A few stepwise tests to isolate the problem:
- Check ground resistance between the plug’s ground pin and the trailer frame; you want a reading under 0.2 ohms.
- With the brake pedal pressed, measure voltage at the blue wire pin; you should see close to 12 volts.
- Load-test the auxiliary and charge lines by connecting an actual accessory and watching for voltage drop under load.
Corroded pins inside the connector, a burned section of harness, or an internal fault in the brake controller itself are the cases where a quick fix in your driveway won’t cut it. At that point, a repair shop with proper diagnostic equipment saves you more time than continuing to chase the fault yourself.
What Wire Gauge and Circuit Protection Does 7-Pin Wiring Need?
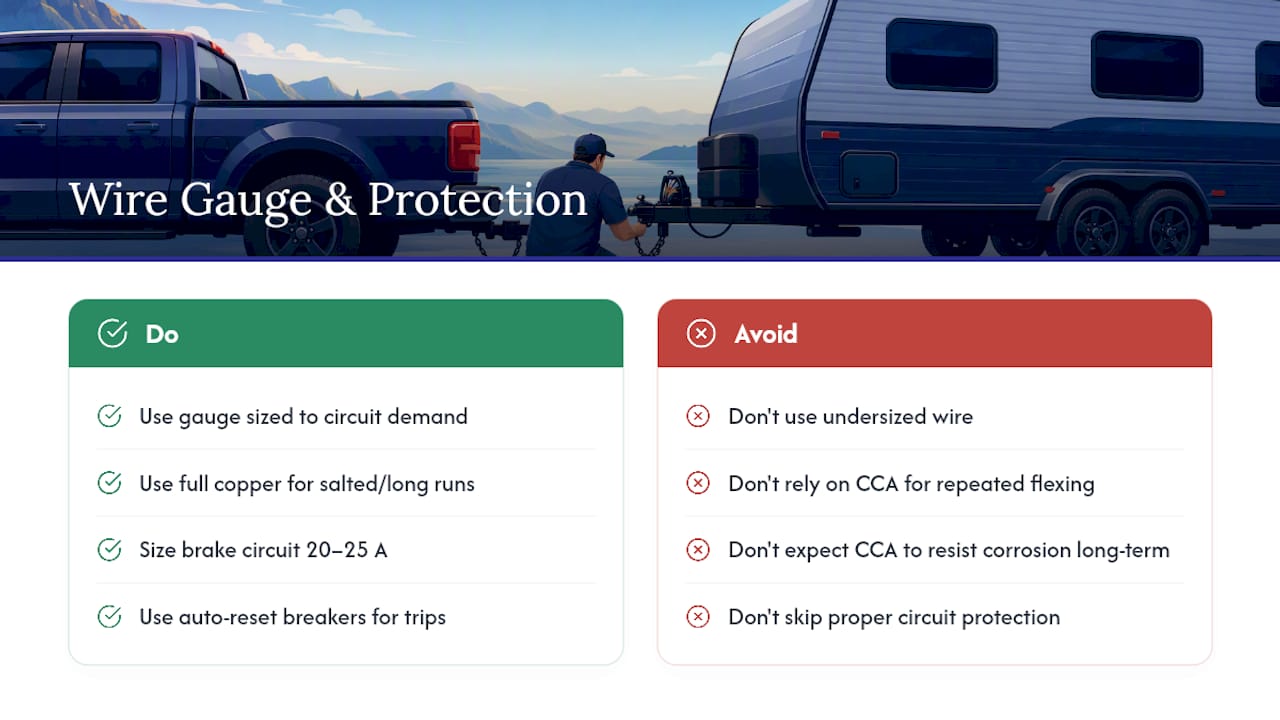
Undersized wire is the quiet killer of trailer electrical systems: it works fine for months, then fails the first time you run brakes and aux power at the same time on a hot day. Recommended minimum gauges break down by circuit demand, not by habit:
Copper-clad aluminum (CCA) wire costs less and works fine for shorter runs, but full copper conductors handle repeated flexing and corrosion better over years of towing, especially at the crimp point. If you’re building a harness that’ll live through salted winter roads, spend the extra money on copper. Breaker sizing follows the same logic: 20 to 25 amps generally covers electric brake circuits, and auto-reset breakers save you a roadside fuse hunt when a circuit trips from a temporary overload.
Which Allstartruckparts Products Fit This Job?
Matching the wire to the job matters more than matching the price tag. Allstartruckparts stocks heavy-duty 14 AWG 7-way trailer cable for full 7-conductor harness builds, a 6-way trailer wire for setups that skip the reverse/backup circuit, and a 5-way trailer wire for basic lighting and brake setups without auxiliary power.
- All three cables are color-coded, DOT and SAE approved, and sold in 25, 50, or 100 foot lengths.
- The 42 LED trailer tail light kit meets FMVSS 108, which matters directly for registration and roadside inspection.
- Submersible, grommet-sealed housings on that light kit hold up to the same road spray that corrodes cheaper connectors at the plug.
Pro Tip: Match your cable gauge to the connector pins you’re terminating. 14 AWG wire crimps cleanly into standard blade terminals; anything heavier needs a larger terminal or you’ll get a loose, corrosion-prone connection.
A Publisher’s Perspective on Wiring Safety
Compliant wiring isn’t paperwork. It’s the difference between a trailer that signals correctly at 65 miles per hour and one that doesn’t. Allstartruckparts builds its cable and lighting products around DOT and FMVSS 108 requirements because those standards exist for a reason grounded in real towing accidents. Test your wiring every season, not just when something stops working, and reach out if you need help matching a part to your setup.
— All
Get the Right Parts for Your 7-Way Build
Buying the correct wire and connector matters more than finding the cheapest option, especially when a bad ground or an unprotected brake line can leave you stranded or, worse, unable to stop your trailer safely. There are cable and lighting products built to DOT and SAE specifications, so you’re not guessing whether a part will pass inspection or survive a wet highway.
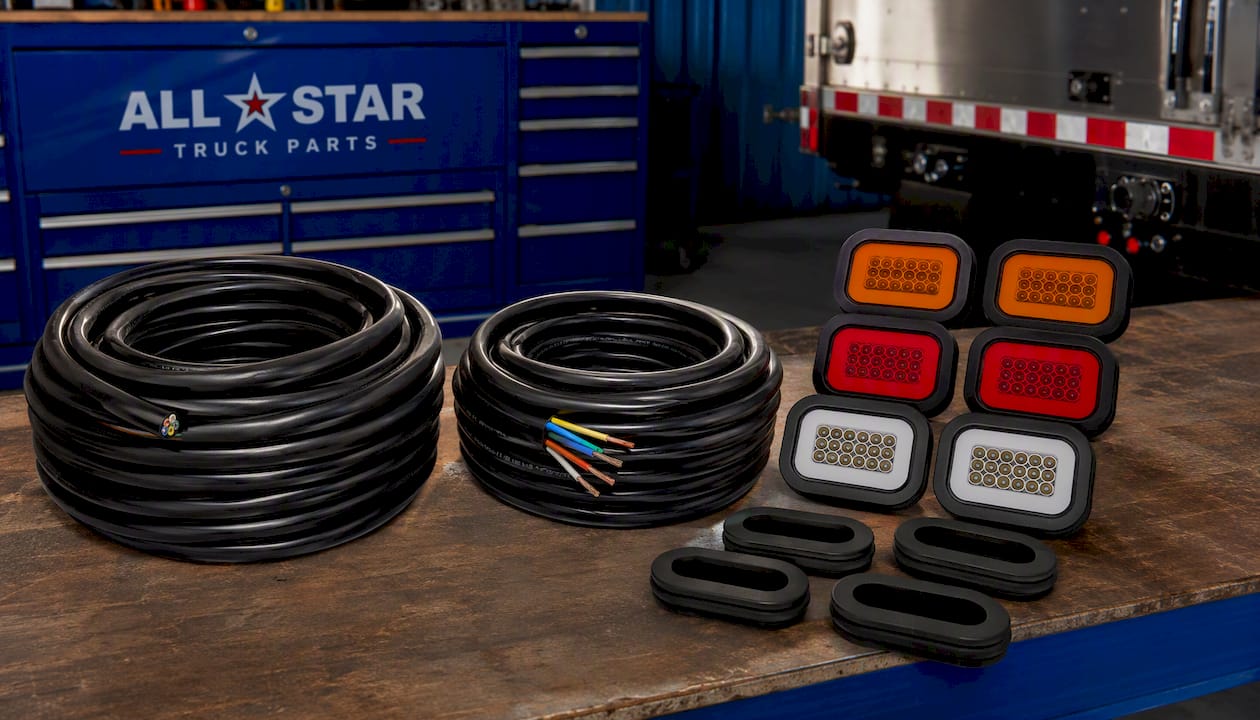
If you’re wiring a full 7-way harness from scratch, the 7-way 14 AWG trailer cable gives you all seven color-coded conductors in one run. Building a simpler trailer that doesn’t need a backup or auxiliary circuit? The 6-way or 5-way wire covers it at a lower conductor count. And if your existing lights are cracked, cloudy, or failed inspection, the DOT-compliant LED tail light kit drops straight into your existing 7-pin circuit.
Check the product pages for exact dimensions and gauge specs, or contact the supplier directly if you’re not sure which cable length or connector style fits your trailer.
Sources
- How to Wire a 7-Way Trailer Plug (2026 Guide)
- Trailer Wiring Diagram and Installation Help - Towing 101
- 7-Pin Trailer Connector Wiring Diagram — Every Pin, Both Standards — AAA Trailer
- 7 Way Trailer Diagram: Plug Wiring & Pinout Guide 2026 - DiagramInfo
FAQ
What Wires Go Where on a 7 Pin Trailer Plug?
Pin functions run ground, tail/running lights, left turn/brake, right turn/brake, electric brake signal, 12V auxiliary, and battery/backup feed, though exact pin position varies between round and RV blade styles.
Is a 7-Pin Trailer Plug Only 4 Wires?
No. A 7-pin connector always carries seven functional circuits; a 4-pin (flat 4) connector handles only ground, tail lights, left turn/brake, and right turn/brake, with no electric brake or auxiliary power capability.
What Is the Color Code for a 7 Pin Trailer Plug?
Common conventions use white for ground, blue for electric brakes, brown for tail/running lights, green and yellow for right and left turn/brake, and black or red for auxiliary and battery feed, though these shift between RV-traditional and SAE blade standards.
How Do I Install 7 Pin Trailer Wiring?
Mount the connector, run a dedicated ground to the chassis or battery negative, wire the blue brake line through a breaker to your brake controller, splice the lighting circuits into your existing harness, and test every circuit with a multimeter before sealing connections.
Can I Connect a 4-Pin Trailer to a 7-Pin Truck Connector?
A 4-to-7 adapter only activates ground, tail lights, and turn/brake signals; it leaves the electric brake and auxiliary circuits inactive, so towing with brakes still requires upgrading the tow vehicle’s wiring and installing a brake controller.
