


Trailer Reverse Lights: Wire and Buy DOT Compliant Kits in 6 Steps
Most trailers roll off the factory line without reverse lights, which is perfectly normal. Adding them is common and legal when you wire them correctly. If your trailer or tow vehicle uses a 5-pin or 7-pin connector, reverse is already supported, you just need to find the right pin. A basic 4-pin setup doesn’t carry a reverse circuit at all, so you’ll need an upgrade before anything lights up. Check your connector first, then move to the wiring section below.
TL;DR:
- Most trailers lack reverse lights by default, and wiring a DOT-compliant light requires upgrading from a 4-pin connector to 5- or 7-pin ones with dedicated reverse circuits.
- Wiring quality, specifically proper gauge wire and secure connections, is more critical to reverse light performance than the number of LEDs in the lamp.
- Reverse lights are not legally mandatory on trailers, but compliance with DOT standards ensures safety and durability in harsh conditions.
- Selecting the right mounting style (grommet, flush, surface, side) depends on trailer type and intended use, with waterproofing being essential.
- It is best to test reverse circuits with a multimeter before installation and address wiring issues like loose pins or corroded contacts promptly.
Table of Contents
- Are Reverse Lights Required on a Trailer?
- How Are Trailer Reverse Lights Wired?
- Which Reverse Lights and Mounts Should You Choose?
- How Do You Install Reverse Lights Step by Step?
- Why Do Reverse Lights Fail or Flicker?
- What Makes a Reverse Lamp Trailer-Ready?
- An Installer’s Take on Reverse Lighting
- Where to Buy DOT-Compliant Reverse Lights
- Sources
- FAQ
Are Reverse Lights Required on a Trailer?
Federal motor vehicle standards don’t mandate reverse lamps on trailers the way they do on passenger cars. Most states follow that same logic, so a trailer without back-up lights usually passes registration and inspection without issue. That said, state rules on modified trailer lighting vary enough that it pays to check your state’s DMV or vehicle code before you start drilling holes, especially if the trailer is used commercially or crosses state lines regularly.
Once you decide to add reverse lights, compliance shifts to the hardware itself. Any lamp used on public roads should meet DOT / FMVSS 108 standards, the federal lighting rule that governs brightness, lens color, and mounting height for vehicle lighting. “DOT-compliant” isn’t a marketing sticker, it means the lamp has been built and tested to that specific standard.
A few practical guardrails matter more than most people expect:
- Never tap into a wire that carries your required brake, turn, or running light circuit without a proper splice or added pin, since a botched connection can knock out lighting you’re legally required to have.
- Use sealed, weatherproof connectors and marine-grade heat-shrink at every splice; corrosion is the number one killer of trailer wiring, not bad bulbs.
- Route new wiring away from moving parts, axles, and anything that generates heat.
How Are Trailer Reverse Lights Wired?
Reverse power comes down to which connector you’re running, and the color codes are fairly consistent across manufacturers. On a 5-pin setup, the added circuit is usually a blue or purple wire dedicated to reverse. Curt Manufacturing’s wiring documentation confirms this blue-wire convention and notes that plenty of trailers ship without that circuit connected even when the plug supports it.
On a 7-pin RV blade connector, the center pin is the one that typically feeds reverse lamps, sitting alongside the standard white ground, brown running lights, yellow left, and green right assignments laid out in most trailer wiring diagrams.
A 4-pin flat connector is the odd one out. It only carries running lights, turn signals, brake lights, and ground, there’s no spare circuit to borrow. If your trailer plug is a 4-pin, you have two real options: upgrade the connector to 5-pin or 7-pin, or skip the plug entirely and run a separate fused circuit straight from the trailer battery.
Wire gauge matters more than people think. Undersized wire is the leading cause of dim or flickering reverse lights, not bad LEDs.
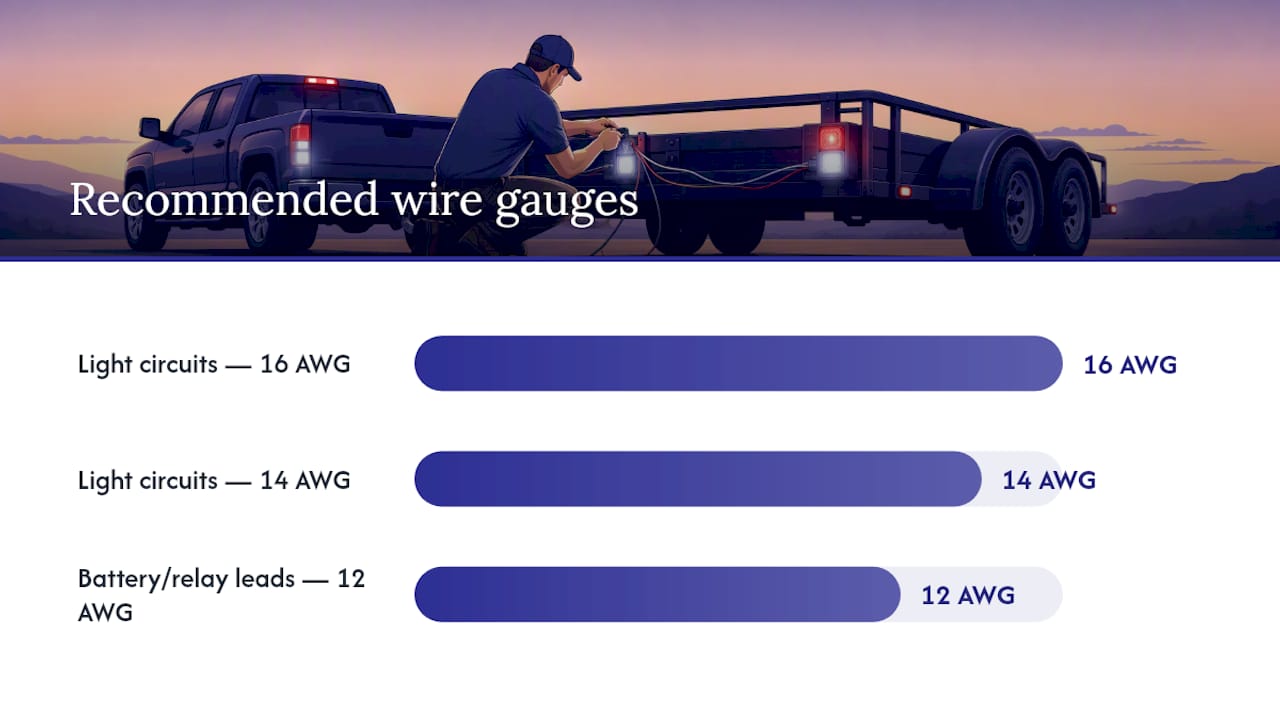
- Use wire of a gauge suitable for light circuits, typically in the range of 16 to 14 AWG.
- Use thicker wire, such as 12 AWG, for battery or relay power leads.
- Fuse as close to the power source as possible, never at the light end.
For utility-style white lights that need to work independent of the tow vehicle, a fused battery feed with a relay is the safer path, and it avoids the backfeed risk you’d get by splicing directly into factory reverse wiring. Wireless remote-trigger kits exist too, and they’re worth a look if you’d rather skip running wire altogether.
Which Reverse Lights and Mounts Should You Choose?
The right lamp depends less on brand and more on four specs: LED count and lens clarity, waterproof rating, DOT/FMVSS compliance, and how the wiring pigtail matches your existing harness. A clean white lens with a tight LED pattern throws more usable light at night than a dim, diffused one, even if the LED count looks similar on paper.
Mount style changes the install more than most buyers expect.
- Grommet mount seats the lamp in a rubber ring pressed into a drilled hole, which handles submersion and vibration well on boat trailers and off-road units.
- Flush mount sits nearly level with the trailer body for a cleaner look, common on enclosed cargo trailers and deck trailers.
- Surface or angle mount bolts on top of the surface, making aim adjustment easy, useful on headache racks and irregular mounting surfaces.
- Side-mounted scene lights throw wide-angle light for tight backing maneuvers in yards or loading docks, separate from your primary back-up lamp.
For a headache rack or rear combo application, a multi-function 6-inch oval kit that combines stop, turn, tail, and reverse in one housing keeps wiring simple. For flush deck or utility trailer builds, a 5x3 rectangle kit with a submersible rating handles road spray and low clearance better than a bolt-on surface light.
How Do You Install Reverse Lights Step by Step?
- Identify your connector. Pop the trailer plug open and check pin count. Test with a multimeter while a helper shifts the tow vehicle into reverse to confirm which pin, if any, goes hot.
- Choose mounting points. Pick a spot with a flat surface, clearance from the axle, and a straight wire run back to the connector or battery.
- Mount the lamp. Drill to the manufacturer’s template, seat grommets fully, and run a bead of marine-grade sealant around any surface-mount base before tightening hardware.
- Wire it in. Run your positive lead to the reverse pin, or to a fused relay circuit off the battery if you’re bypassing the plug. Ground to bare metal chassis, size the wire correctly, and fuse close to the source.
- Protect the run. Loom or split-tube any wire crossing near the frame rail, and zip-tie every foot or so to prevent chafing.
- Test it. Confirm the lamp only energizes in reverse, not with brakes or running lights, and check for backfeed into unrelated circuits before calling it done.
Pro Tip: Test your new reverse circuit on level ground after dark before you tow anywhere. A weak ground connection often looks fine in daylight and only shows up as a dim, useless glow at night.
If your trailer has electric brakes, a 24-volt system, or an integrated lighting controller, hand the wiring off to a professional. Those systems don’t tolerate a wrong splice the way a simple lighting circuit does.
Why Do Reverse Lights Fail or Flicker?
Most no-power complaints trace back to one of four things: a fuse that blew during install, a connector pin that never made contact, a bad ground, or a vehicle-side reverse circuit that simply wasn’t hot to begin with. Confirm the tow vehicle’s reverse pin is actually live before assuming the trailer lamp is defective.
- Dim or flickering lamps almost always point to undersized wire or a corroded contact point, not a failing LED.
- If you added a battery-fed utility circuit, install a diode or isolator relay so the trailer battery can’t backfeed into the tow vehicle’s electrical system during normal driving.
- Once a year, inspect seals for cracking, clean corroded contacts, and retorque mounting hardware that’s worked loose from road vibration.
- Replace any cracked lens immediately. A hairline crack lets in enough moisture over a season to kill an otherwise good LED board.
What Makes a Reverse Lamp Trailer-Ready?
Trailers sit lower, closer to spray, and take more direct road debris than most towing vehicles ever will, so waterproofing isn’t optional. Allstartruckparts builds its lamps to IP67 waterproof standards with sealed housings specifically because trailer-mounted lights face that exposure daily.
Here’s how the three DOT-certified kits line up against typical trailer builds:
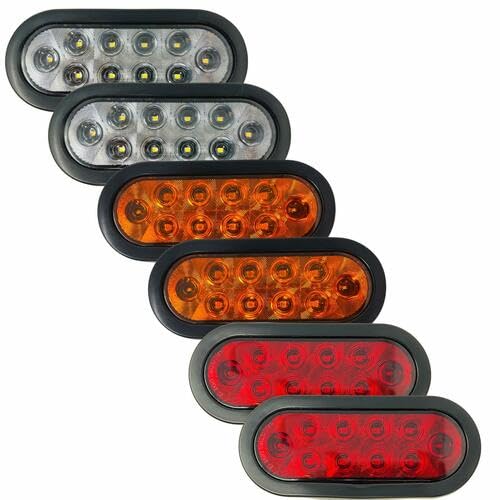
- The 10 LED 6-inch oval kit suits headache racks and rear combo setups where one housing needs to cover stop, turn, tail, and reverse.
- The 24 LED 6-inch oval kit steps up LED density for larger trailers that need brighter, more visible reverse output at night.
- The 5x3 rectangle kit works best for flush deck and utility trailer installs where a submersible rating and low profile both matter.
Every listing includes exact dimensions, grommet specs, and pigtail wiring details on the product page, worth reviewing before you drill.
An Installer’s Take on Reverse Lighting
The advice floating around forums treats reverse lights like an afterthought bolted onto a bigger wiring job. That’s backward. The reverse circuit is the one piece of trailer lighting most owners get wrong, because it’s the one piece factory setups routinely skip. Get the connector question right first, everything else follows from there.
What’s overrated in most guides is the emphasis on LED count. A 42-LED lamp with a poor ground connection is dimmer than a 10-LED lamp wired correctly. Wire gauge, fusing, and a clean ground do more for actual visibility than any spec sheet number.
If you take one thing from this guide, prioritize the connector upgrade over the light purchase. A 4-pin trailer with a brand-new premium lamp still won’t reverse-light without a 5-pin or 7-pin swap, or a separate battery feed. Buy the connector fix first, then shop lamps.
— All
Where to Buy DOT-Compliant Reverse Lights
Before you check out, match two things: your connector type and your mounting style. A grommet-style lamp won’t drop cleanly into a flush-cut opening, and a 2-pin pigtail won’t plug into a 7-way harness without an adapter.
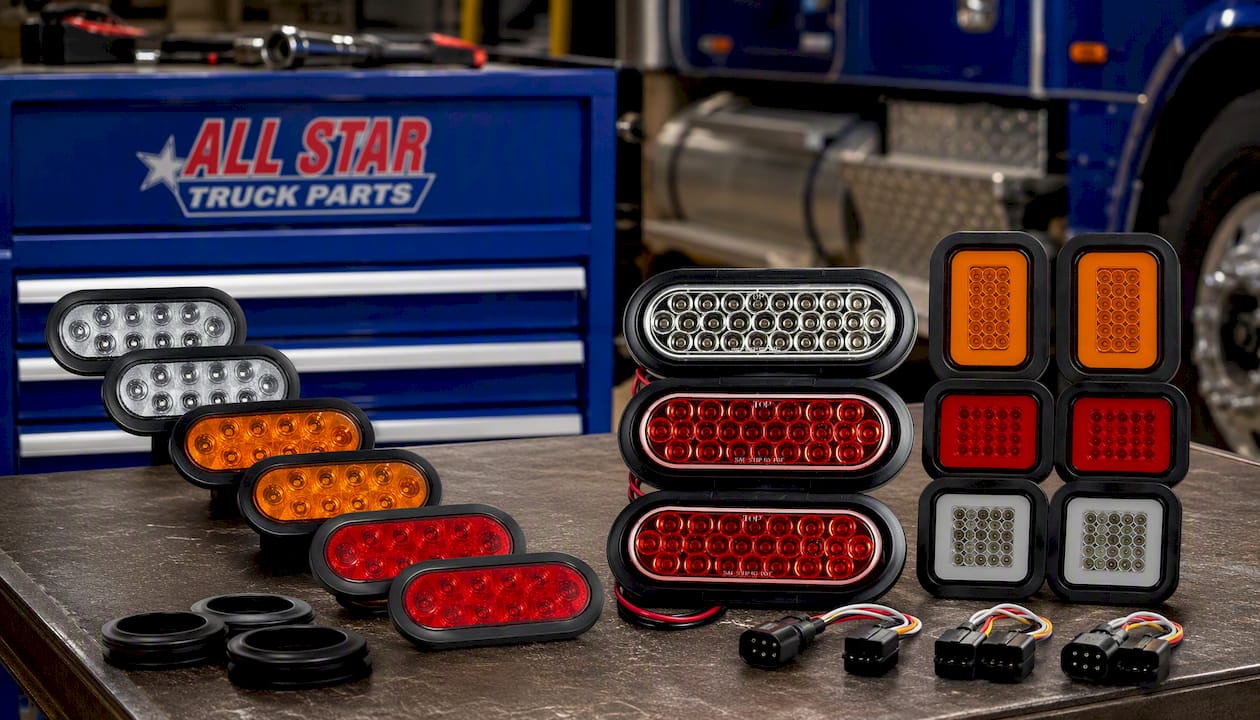
Various kits covered in this guide are available that meet DOT / FMVSS 108 standards with IP67 waterproof housings rated for the spray, grit, and vibration trailers see every trip. If your rig runs a headache rack, the 10 LED oval kit covers stop, turn, tail, and reverse in one housing. For higher brightness needs, step up to the 24 LED oval kit. Deck and utility trailer owners should look at the 5x3 rectangle kit for its low profile and submersible rating.
Need a grommet-mount option or a different pigtail configuration? Browse the reverse/backup grommet light listing, or contact support for help matching wiring harnesses and connectors to your specific trailer before you order.
Sources
Before cutting any wire, cross-check your connector against a trailer wiring diagram or Curt’s towing electrical guide. If you’re planning a longer trip this season, a pre-trip towing checklist covers heat and load stress worth knowing about too.
- Trailer Wiring Diagrams: 4, 5, 6 and 7-Pin Guide
- Wiring Reverse Lights On Your Camper: A Step-By-Step Guide | ShunAuto
- Trailer Wiring Diagram and Installation Help - Towing 101
FAQ
Why Don’t Trailers Have Reverse Lights by Default?
Federal lighting standards don’t require reverse lamps on trailers, so manufacturers skip the extra circuit and hardware to keep production costs down. Adding them afterward is a common, straightforward upgrade.
Can You Wire Reverse Lights to a Trailer Plug?
Yes, if the plug is a 5-pin or 7-pin connector with a dedicated reverse circuit, usually a blue or purple wire on 5-pin setups. A 4-pin plug has no spare circuit, so you’d need a connector upgrade or a separate fused battery feed instead.
Does a 7-Pin Trailer Plug Have a Reverse Light Wire?
Most 7-pin RV blade connectors use the center pin for reverse lamps, though it’s worth testing with a multimeter since wiring can vary between vehicle manufacturers.
Is a Reverse Light Legally Required on a Trailer?
Federal standards don’t mandate it, and most states don’t either, but rules vary enough that checking your state’s DMV or vehicle code before modifying registered lighting is worth the five minutes it takes.
What Gauge Wire Should I Use for Trailer Reverse Lights?
Use 16 to 14 AWG for the light circuit itself and step up to 12 AWG for any battery or relay hot lead, fusing as close to the power source as possible.
Recommended
Related Lighting & Accessories


- $ 26.50
$ 49.95- $ 26.50 Save $ 23.45
- Unit price
- per


- $ 34.50
$ 59.95- $ 34.50 Save $ 25.45
- Unit price
- per


- $ 29.95
$ 49.95- $ 29.95 Save $ 20.00
- Unit price
- per
