


15s Sealed Crimp Rules: Heat Shrink vs Crimp for Hobbyists & Techs
For most vibration and moisture-exposed wiring, the right answer is both: a correctly crimped joint finished with adhesive-lined heat shrink. Crimping does the electrical and mechanical work; heat shrink seals it against water and road grime. Save solder for protected, low-movement joints where flexing wire isn’t a risk, and treat your crimping tool and inspection habits as the real variable between a repair that lasts and one that fails at 60 mph.
TL;DR:
- Proper crimping relies on matching the terminal to the wire gauge and using a ratcheting crimper with the correct die for consistent, gas-tight joints.
- Adhesive-lined heat shrink seals over a crimp are essential for moisture resistance and strain relief, especially in marine and exterior wiring.
- Crimped joints should always be inspected with a pull test and resistance check before sealing to prevent hidden failures.
- Heat shrink connectors alone cannot fix loose or poorly seated crimps; they only protect a good connection.
- For high-vibration environments, sealed crimps combining crimp and heat shrink typically outperform soldered joints due to maintained wire flexibility.
Table of Contents
- Heat Shrink Connectors vs Crimp: What Each One Actually Does
- How Do You Crimp a Wire Connector Correctly?
- Do Heat Shrink Connectors Need to Be Crimped First?
- What Tools and Steps Produce a Reliable Sealed Crimp?
- Which Method Fits Your Project: Crimp, Heat Shrink, Solder, or Hybrid?
- How All Star Truck Parts Supports a Sealed-Crimp Approach
- The Sealed Crimp Rule Most Wiring Guides Skip
- Where to Find the Right Connectors for the Job
- Sources
- FAQ
Heat Shrink Connectors vs Crimp: What Each One Actually Does
The confusion starts with a labeling problem. People say “heat shrink connector” as shorthand for the whole splice, but the metal barrel inside is what actually joins the wires. The shrink sleeve around it is protection, not the connection itself.
A crimp mechanically deforms a metal barrel around bare copper strands, creating a gas-tight junction with low resistance and real pull-out strength. A heat-shrink sleeve (adhesive-lined or single-wall) shrinks over that joint when heated, sealing out moisture and adding strain relief. Solder melts filler metal into the strands for a permanent metallurgical bond, but it stiffens the wire right at the joint.
Here’s how they stack up on the traits that matter for trailer, marine, and automotive wiring:
- Continuity/resistance: solder is lowest resistance, a proper crimp is close behind, and both beat a loose or corroded connection every time.
- Vibration tolerance: crimp wins because it keeps the strands flexible; soldered joints add stiffness that raises fatigue risk unless there’s separate strain relief.
- Moisture resistance: adhesive-lined heat shrink over a crimp is the standard for exterior and marine work.
- Reworkability: crimps and solder joints are both permanent; only butt connectors with removable bullet plugs let you disconnect without cutting.
- Speed: a ratcheting crimper beats a soldering iron and heat gun combo for volume work, hands down.
How Do You Crimp a Wire Connector Correctly?
A good crimp starts with matching the terminal to the wire gauge and using a die sized for that terminal, not a generic pliers-style crimper. Strip length matters more than most people think: too short and the barrel crushes insulation into the joint; too long and bare copper hangs out past the barrel, inviting corrosion. The goal is a “gas-tight” crimp, meaning the strands deform enough that no air or moisture can migrate between them.
Pros of crimping:
- Highly repeatable once you’ve dialed in the right die and terminal combination
- Preserves strand flexibility, which is why it’s the preferred method for vibration-prone harnesses
- Fast enough for production-volume harness work
Cons of crimping:
- Results depend entirely on tool quality; cheap pliers-style crimpers produce inconsistent, weak joints
- A crimp alone isn’t sealed against moisture
Common mistakes include using the wrong die cavity, crimping over insulation instead of bare wire, and skipping inspection entirely. Two quick checks catch most bad crimps: a firm pull test on each wire, and a continuity or resistance check with a multimeter before you commit to sealing it up.
Pro Tip: If a crimp terminal spins freely on the wire or the insulation grip crushes flat instead of gripping, redo it. A crimp that looks fine from the outside can still be an open circuit waiting to happen.
Do Heat Shrink Connectors Need to Be Crimped First?
Yes, and this is where a lot of DIY wiring goes wrong. A shrink sleeve, even a solder-seal type with solder ring inside, cannot fix a loose or poorly seated joint. Community troubleshooting threads consistently point out that heat shrink protects a good connection; it doesn’t create one.
Adhesive-lined (dual-wall) heat shrink works by melting a thermoplastic adhesive lining as the outer tubing shrinks, and that adhesive flows around the wire and connector to form a watertight seal once it cools. Solder-seal sleeves combine a ring of solder with adhesive at each end, so heat both bonds the wires and seals the joint in one step, though they demand more even heat control to work reliably.
Advantages:
- Adhesive-lined shrink is close to the minimum standard for any exposed wiring, including trailer and marine harnesses
- Adds real strain relief at the point where wire meets connector
- Single-wall shrink still helps in dry, protected interior runs where moisture isn’t a factor
Disadvantages:
- Requires an open flame or heat gun, which isn’t always practical in tight spaces or near fuel lines
- Costs more per connector than bare crimp terminals
- Can visually hide a bad crimp underneath, which is exactly why inspection has to happen before sealing
Marine wiring, trailer harnesses, and any connection living outside a dry cabin should treat adhesive-lined heat shrink as mandatory, not optional.
What Tools and Steps Produce a Reliable Sealed Crimp?
The sequence that holds up in the field, whether you’re splicing marker light wiring or repairing a trailer harness, follows the same order every time:
- Strip the wire to the length specified for your terminal, usually matching the barrel length.
- Insert the bare strands fully into the terminal barrel until they’re visible at the inspection window, if there is one.
- Crimp using the correct die on a ratcheting crimper, which won’t release until full pressure is applied.
- Inspect the crimp visually and with a pull test before moving on.
- Slide adhesive-lined heat shrink over the joint, centering it so the adhesive covers both wire jackets.
- Apply heat evenly with a heat gun, rotating the joint until you see adhesive flow out both ends.
Tools worth owning: a ratcheting crimper with interchangeable or matched dies (not a multi-tool crimper), a heat gun with adjustable temperature rather than a lighter, quality self-adjusting wire strippers, and a basic multimeter for continuity and resistance checks.
Watch the heat gun step closely. Adhesive-lined connectors still fail when the adhesive never fully flows, usually because the installer pulled the heat away too soon or held it too far from the sleeve. You want visible adhesive beading at both ends, not just a shrunk-down sleeve that looks done.
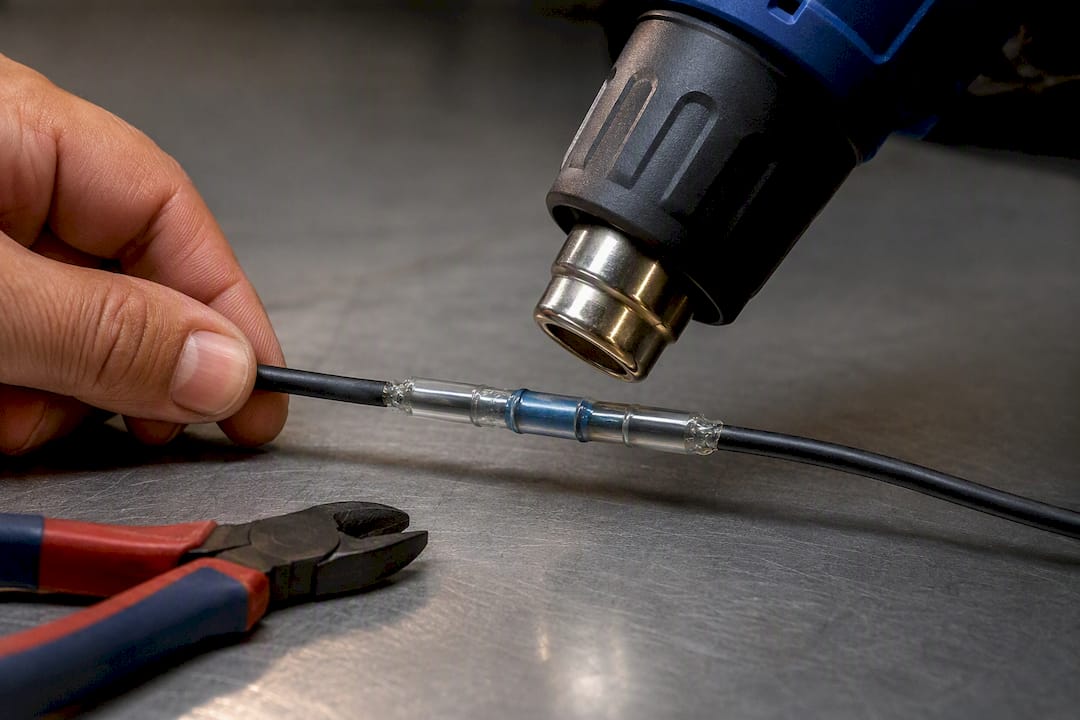
Pro Tip: Keep the heat gun moving in a slow circle around the connector instead of holding it in one spot. A static heat source can scorch one side of the sleeve while the other side never reaches adhesive-flow temperature.
After heating, let the joint cool undisturbed for a minute, then do a final tug test and a resistance check if the circuit is accessible. A properly finished sealed crimp should read close to zero ohms across the joint.
Which Method Fits Your Project: Crimp, Heat Shrink, Solder, or Hybrid?
Match the method to the environment, not to whatever’s sitting on your bench. Run through this checklist before you commit:
- Interior, low-vibration runs (dashboard accessories, interior lighting): a clean crimp is often enough; single-wall heat shrink is a nice-to-have.
- Engine bay or chassis wiring: sealed crimp (crimp plus adhesive-lined heat shrink) handles both vibration and heat cycling.
- Trailer lighting and harnesses: sealed crimp is the standard here, since sealed crimp connectors combine mechanical retention with environmental sealing for exposed, constantly-flexing wiring.
- Marine wiring: adhesive-lined heat shrink over a crimp isn’t negotiable, following the corrosion-prevention guidance from the American Boat and Yacht Council.
- Removable accessories: bullet connectors or plugs let you disconnect without cutting the wire, useful for seasonal gear or swappable harness sections.
- Bench prototyping: solder gives you the lowest resistance for signal-critical, stationary circuits where nothing moves once it’s mounted.
How All Star Truck Parts Supports a Sealed-Crimp Approach
Some wiring component providers build their products around the sealed-crimp logic this guide recommends. The DOT-compliant lighting and connector lines use 100% tinned copper wiring, which resists corrosion far better than bare copper when moisture eventually finds its way past a seal, and weatherproof plug housings that pair naturally with an adhesive-lined heat shrink finish. That combination is important on trailer marker lights and harness repairs, where connectors may be exposed to road spray for extended periods.
The Sealed Crimp Rule Most Wiring Guides Skip
Most wiring advice treats crimp, solder, and heat shrink as competing options, as if you’re supposed to pick one. That framing misses the point. The real skill isn’t choosing a side in the heat shrink versus crimp debate; it’s recognizing that these tools do different jobs and building a workflow where each one does its job well.
Where conventional advice falls short is inspection. Plenty of guides walk through crimping technique in detail, then treat heat shrink as an afterthought you slap on to “finish” the job. That backward priority is how bad joints get sealed in and hidden for months until a trailer light starts flickering on the highway. Standards like IPC/WHMA-A-620 exist precisely because workmanship, not material choice, determines whether a termination holds up.
If you take one thing from this guide, make it this: inspect before you seal, every single time. A pull test and a resistance check take fifteen seconds and catch the failures that heat shrink would otherwise bury.
— All
Where to Find the Right Connectors for the Job
Once you know sealed crimp is the move, the next question is whether your connectors and wire actually match the terminal you’re using. Allstartruckparts carries wiring built for exactly this workflow. The double male bullet plug roll gives you 150 weatherproof male plugs with 8 inch leads between them, built from 100% tinned copper wiring in 18AWG, which is the gauge most marker lights and side clearance lights call for.
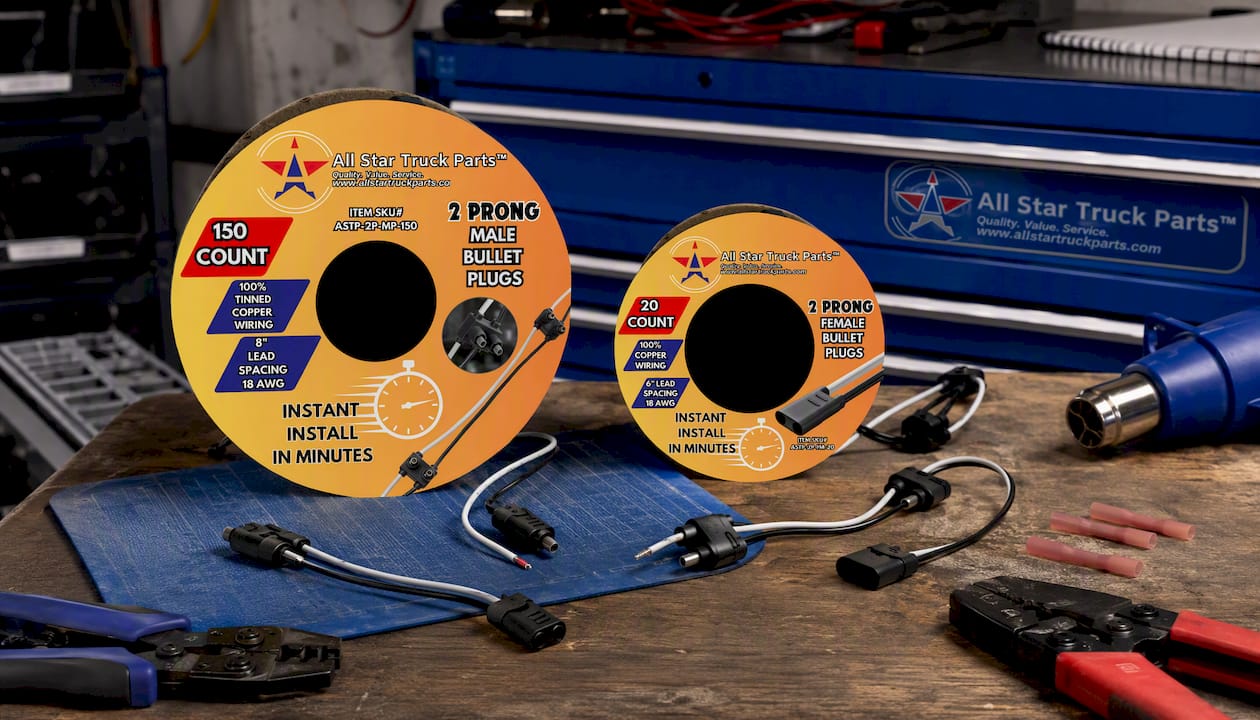
Pair it with the matching double female bullet plug connector roll, also 18AWG with 100% copper wiring and 8 inch leads, for quick harness installation on trailer marker lights and side clearance runs. Both rolls make it easy to cut continuous lengths to the exact run you need instead of splicing short factory leads. Before you crimp anything, check that your terminal barrel size matches 18AWG and that your crimper has the right die for it. Browse the full connector and wiring lineup at Allstartruckparts to find the gauge and plug style that fits your trailer or harness repair.
Sources
- How To Choose The Proper Solder Vs Crimp Vs Heat-Shrink Method For Reliable Wire Repairs (CarSymp)
- Best 12V connection: heat-shrink, solder, and crimp terminals (Del City blog)
- Ancor Adhesive Lined Heat Shrink AWG Butt Connectors - product page (Jamestown Distributors)
FAQ
Do heat shrink connectors need to be crimped?
Yes. Heat shrink seals and protects a joint, but the crimp is what actually creates the electrical and mechanical connection. Heat shrink over a loose or poorly seated crimp will still fail.
What are the disadvantages of crimp connectors?
Crimp quality depends heavily on using the correct terminal, wire gauge, and die, and a bare crimp isn’t sealed against moisture on its own. That’s why sealed crimp workflows finish every crimp with adhesive-lined heat shrink for exterior wiring.
What are the disadvantages of heat shrink tubing?
It requires a heat source, which isn’t always practical near fuel lines or in tight spaces, and it can visually hide a bad crimp underneath if you skip inspection first. Single-wall shrink also offers no real moisture sealing compared to adhesive-lined versions.
Is crimping just as good as soldering?
For vibration-prone wiring, crimping is often the better choice because it keeps the strands flexible, while soldered joints stiffen at the connection point and can fatigue over time without separate strain relief. Solder does offer lower resistance, which makes it a better fit for stationary, signal-critical circuits.
