


Fleet Techs Install 6 ohm 50W LED Load Resistors for Safe DOT Grade Mounts
If your LED turn signals or marker lamps hyper-flash or trigger a bulb-out warning, you need to restore the electrical load the vehicle’s flasher circuit expects. In most cases, that means installing a properly mounted LED load resistor, typically a 6 ohm, 50 watt unit. On newer trucks with CAN bus monitoring, a vehicle-compatible module or CANBUS bulb often work better and produce less heat.
TL;DR:
- Use a load resistor only on older vehicles with thermal or electromechanical flashers; newer trucks with CAN bus systems benefit from LED-compatible modules instead.
- Proper installation involves mounting a 6 ohm, 50 watt resistor on bare metal and wiring it in parallel with the LED bulb, ensuring correct grounding and heat management.
- Confirm whether the vehicle runs a simple relay or a CAN bus system, as resistors won’t fix circuit monitoring on modern trucks, requiring specific LED bulbs or modules instead.
- Always verify the circuit’s fuse rating and avoid wiring resistors into brake or auxiliary circuits to prevent fire hazards.
- Mount resistors securely using metal brackets and recheck connections after 10-15 minutes of operation to ensure heat does not cause component failure.
Table of Contents
- Quick Diagnostic Checklist for LED Hyper-Flash and Bulb-Out Errors
- How Load Resistors Stop Hyper-Flash
- When to Choose a Load Resistor vs. a CANBUS Module
- Step-by-Step Installation: Wiring, Mounting, and Testing
- Common Resistor Specs, Counts, and Wiring Limits
- Troubleshooting Pitfalls and Safety Warnings
- What Fleet-Grade LED Lighting Support Actually Looks Like
- Parts That Make Resistor Installs Hold Up on the Road
- Why Resistors Get Blamed for Problems They Didn’t Cause
- Sources
- FAQ
Quick Diagnostic Checklist for LED Hyper-Flash and Bulb-Out Errors
Before you order parts, confirm the symptom and rule out wiring faults. A resistor fixes a load mismatch, not a bad ground or a loose pin, so skipping this step wastes time and money.
- Watch the flash pattern. Hyper-flash means the turn signal cycles roughly twice as fast as normal, and a bulb-out message on the dash usually points to the same root cause: the module reads current draw and assumes a bulb has failed.
- Check voltage with a multimeter or test light. Probe the socket during operation. A pulsing or unstable reading with the circuit otherwise intact confirms the flasher is reacting to low current draw, not a wiring break.
- Verify ground integrity. Sand a clean, bare-metal spot for a star ground and test resistance from the fixture to the frame. A high-resistance ground causes flicker that looks like hyper-flash but has nothing to do with load.
- Identify the flasher type. Some trucks use a simple removable relay you can swap for an LED-rated version. Others run signals through a body control module (BCM) or CAN bus, where resistors won’t solve the problem the way a module will.
How Load Resistors Stop Hyper-Flash
Flasher circuits on most trucks and trailers monitor current draw to detect a burned-out bulb. An incandescent turn signal bulb typically pulls somewhere around 21 to 27 watts, and the flasher’s timing circuit is calibrated around that draw. LED bulbs pull a fraction of that current, so the flasher reads the drop as a failed bulb and speeds up the flash rate or lights a warning as explained in Headlight Revolution’s breakdown of the issue.
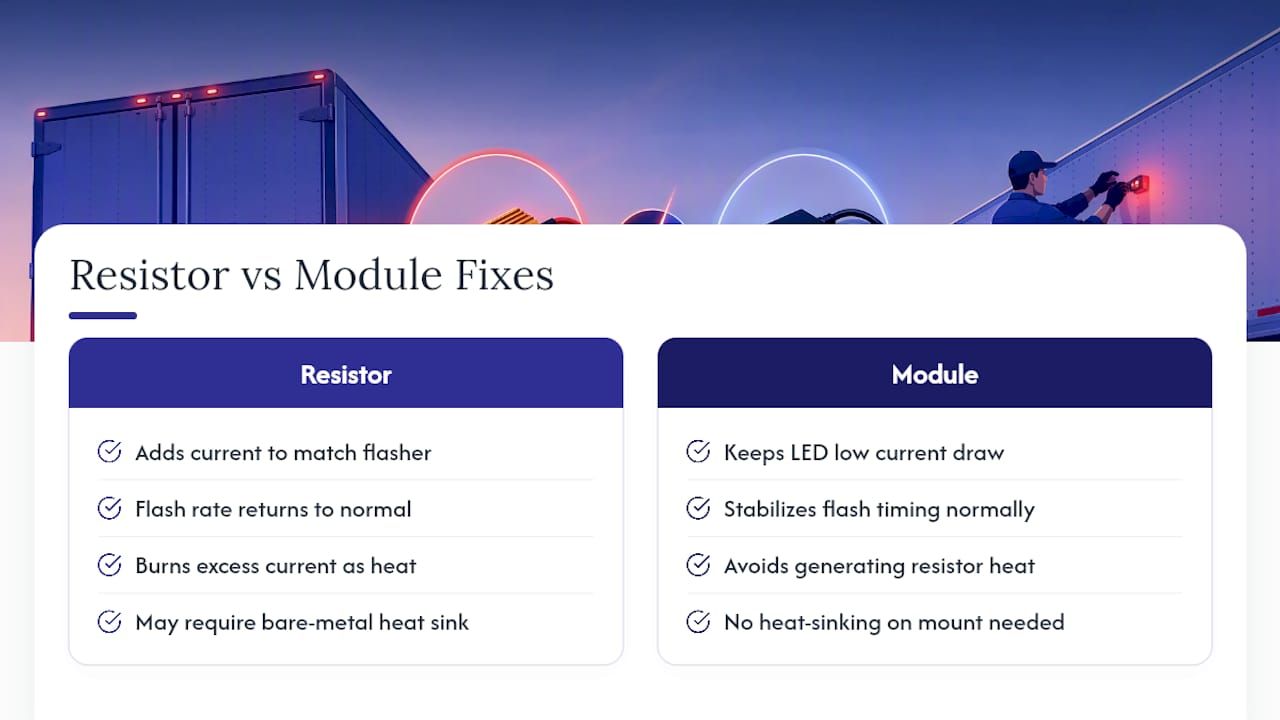
Wiring a resistor in parallel with the LED circuit adds back enough current draw to bring the total load close to what the flasher expects. The circuit stabilizes, and the flash rate returns to normal. That fix comes at a cost: resistors burn off the excess current as heat, sometimes reaching temperatures that require mounting on bare metal for heat sinking, according to Sylvania’s load equalizer installation guide. Module or vehicle-level fixes avoid that heat entirely and keep the low current draw that makes LEDs worth installing in the first place.
When to Choose a Load Resistor vs. a CANBUS Module
Not every hyper-flash problem calls for the same fix. Match the solution to the vehicle’s electronics rather than defaulting to resistors on every job.
- Use a load resistor when the vehicle runs an older thermal or electromechanical flasher, or when a tow module has no LED-compatible equivalent available.
- Use CANBUS-compatible LED bulbs or a manufacturer-recommended trailer adapter when the vehicle monitors current through a BCM or CAN bus network, since resistors can’t always satisfy that kind of monitoring cleanly.
- Swap the flasher relay on older trucks where an LED-rated replacement relay exists. It’s often cheaper and cooler-running than adding resistors to every circuit.
- Weigh the tradeoffs. Resistors add heat and wiring complexity but work almost universally. Module-level and vehicle-level fixes preserve LED efficiency but depend on parts being available for that specific make, model, and year, a point Spencer Trailers covers well when discussing trailer-vehicle compatibility. Modern module solutions, including fast-flash fixes built for late-model Silverado and Sierra trucks, show how OEM-level electronics increasingly make plug-and-play modules the better long-term answer.
Pro Tip: Check the tow vehicle’s owner’s manual or wiring diagram before assuming you need resistors. Some newer trucks already compensate for LED load internally, and adding resistors you don’t need just creates unnecessary heat.
Step-by-Step Installation: Wiring, Mounting, and Testing
Fitting a load resistor correctly takes about 20 minutes per circuit once you’ve confirmed it’s the right fix. Rushing the mounting step is where most installs go wrong.
- Disconnect the battery before touching any wiring, and identify the left and right turn signal circuits separately. Each affected side needs its own resistor.
- Pick the correct resistor rating for the circuit (commonly 6 ohm, 50 watt for standard turn signal loads) and confirm the fuse protecting that circuit matches the wire gauge, not just the new load.
- Choose a connection method. Soldered joints sealed with heat-shrink tubing hold up best in wet, vibration-heavy trucking environments, a point emphasized in Headlight Revolution’s installation walkthrough. Insulation displacement connectors (IDC) or T-taps install faster but are more prone to corrosion and loosening over time unless properly sealed.
- Wire the resistor in parallel with the LED bulb’s positive and ground leads, matching the circuit’s existing polarity.
- Mount to bare metal. Sand a clean spot free of paint and coating, then secure the resistor’s mounting tab with a machine screw rated for the tab size. Keep it clear of wiring harnesses, plastic trim, and anything flammable.
- Reconnect the battery and test. Cycle the turn signals and confirm a normal flash rate with no dashboard warnings.
- Recheck after 10 to 15 minutes of operation. Feel for excessive heat migration into nearby components and confirm every connection is still tight. A resistor that’s shifted position or a connector that’s loosened under heat is a common failure point on the road.
Pro Tip: Label each resistor’s circuit with a paint marker or zip-tie tag during install. When you’re troubleshooting six months later on a dark shoulder, you’ll want to know which resistor belongs to which side without tracing wire.
Common Resistor Specs, Counts, and Wiring Limits
A 6 ohm, 50 watt load equalizer is the standard spec sold for 12 volt turn signal applications, and at typical charging voltage of 12 to 13.5 volts it dissipates enough power to run genuinely hot in normal operation, which is why Sylvania’s datasheet treats mounting instructions as a safety requirement, not a suggestion.
Plan on one resistor per affected circuit, left and right separately, and verify against your tow module or vehicle wiring diagram rather than guessing. Match wire gauge to the added load and protect the smallest conductor in the circuit, never the resistor’s rated capacity. Raising a fuse size to stop nuisance blowing almost always means there’s an underlying wiring fault that needs fixing, not a bigger fuse. Never wire a load resistor into a brake-charge line, breakaway circuit, or auxiliary battery-charging circuit. Those circuits carry current for entirely different purposes, and adding resistance there creates a real fire and equipment risk.
Troubleshooting Pitfalls and Safety Warnings
Most callbacks on resistor installs trace back to heat management or grounding, not the resistor itself.
- Mount away from heat-sensitive parts. A resistor bolted too close to wiring insulation or plastic trim can soften or melt nearby materials over time.
- Use rated hardware. A machine screw sized for the mounting tab keeps the resistor seated even under highway vibration.
- Chase persistent ghosting or faint glow. If a turn signal lamp glows faintly when it should be off, recheck grounds first. A high-resistance ground path, not the resistor, is the more likely culprit, and a proper star ground often clears it, as EngineerSkill’s grounding guide explains.
- Re-verify hyper-flash after install. If the flash rate is still off, double-check wiring order before assuming the resistor is defective. Some vehicles genuinely need a module fix instead.
- Never bypass fuse ratings. Keep fuse size matched to wire gauge and the circuit’s original design spec, full stop.
Manufacturer guidance on load equalizers repeatedly flags temperature rise as the primary safety concern with these devices, which is why every reputable installation guide treats metal mounting as mandatory rather than optional.
What Fleet-Grade LED Lighting Support Actually Looks Like
The company builds DOT-compliant lighting designed for trucks and trailers that operate in demanding conditions such as rain, road salt, and vibration. That focus on leak-proof housings and heavy-gauge wiring matters directly here: a resistor installation is only as reliable as the fixture and wiring it’s paired with.
When you’re already under a truck fixing a hyper-flash issue, it’s worth checking the condition of the lamp itself and the ground path feeding it. Pairing a resistor fix with a waterproof combination tail light or a sealed mid-turn signal light closes out the job properly instead of leaving a marginal fixture in place next to new wiring work.
Parts That Make Resistor Installs Hold Up on the Road
A load resistor is only half the job. Where and how you mount it decides whether it’s still doing its job in six months or shaking loose on a gravel road. The stainless steel bus light mounting bracket gives you a solid metal surface to bolt a resistor to on Freightliner, Peterbilt, Kenworth, and Volvo trucks and buses where a bare, accessible metal panel isn’t always handy.
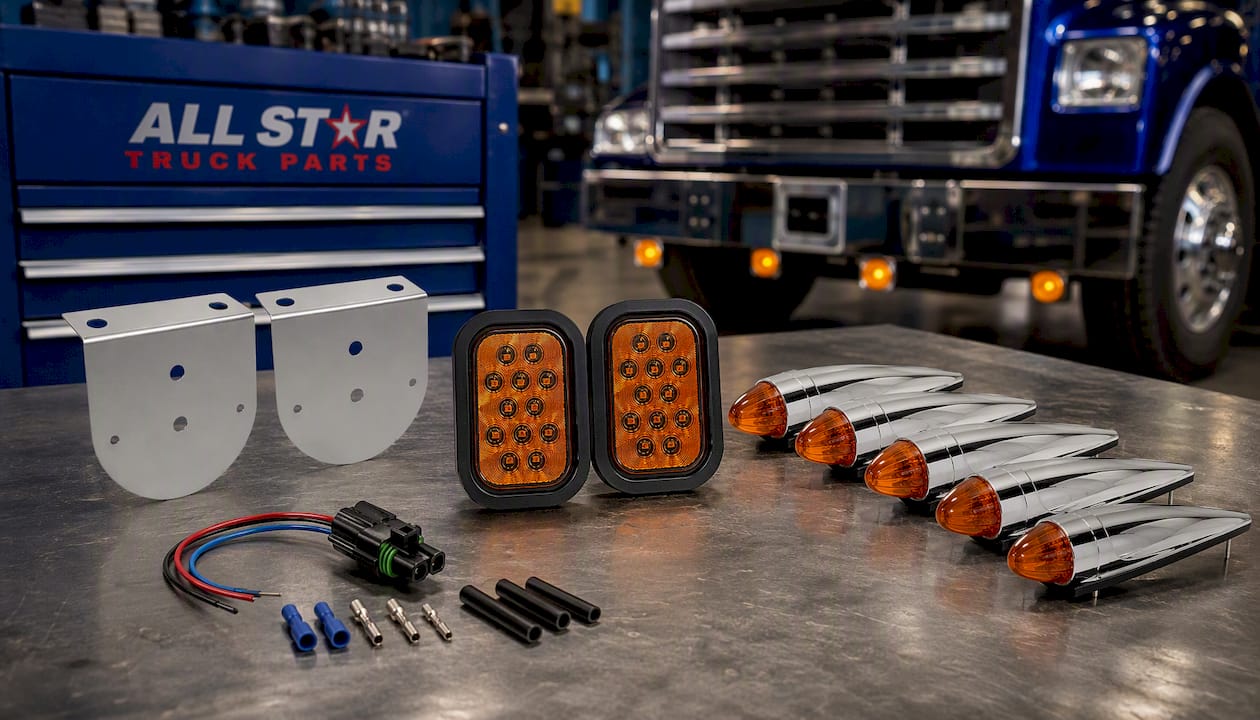
If the lamp itself needs replacing while you’re in there, the 5x3 amber and red rectangle signal light kit comes with a grommet and three-wire pigtail plug already built in, so you’re not improvising a splice on a flatbed or hitch-mounted fixture. For cab and roof lighting on the same truck, the 17 LED amber torpedo marker light assembly fits International, Kenworth, Peterbilt, Freightliner, and Mack cabs with a chrome housing built for daily highway use.
Browse the full lighting, wiring, and reflective tape lineup to source mounting hardware, replacement lamps, and connectors in one order before your next install.
Why Resistors Get Blamed for Problems They Didn’t Cause
The biggest misconception in this repair isn’t about resistors at all. It’s the assumption that hyper-flash always means you need one. A shop that reaches for a resistor kit before checking the ground path is going to install parts that don’t fix the actual problem, and the customer comes back in three weeks with the same flicker.
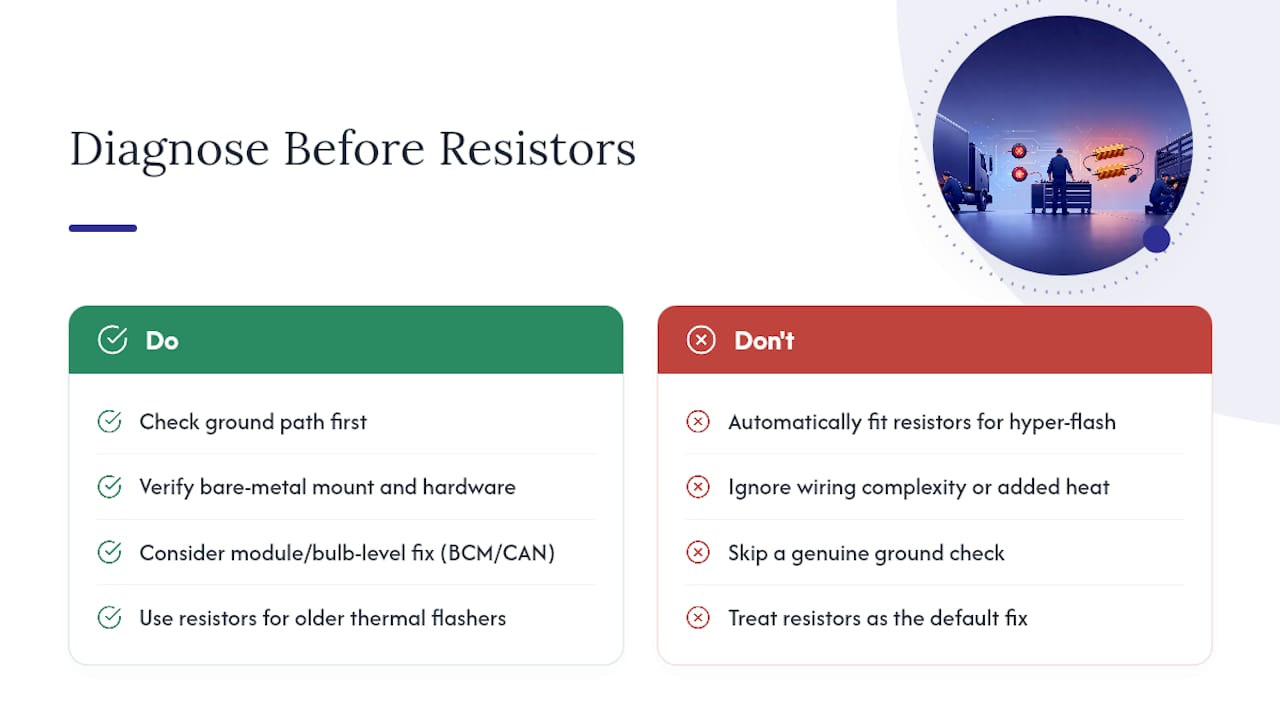
The harder truth is that modern trucks are moving away from needing resistors at all. As more fleets run BCM and CAN bus electronics, the smarter long-term fix increasingly lives at the module or bulb level, not in a heat-generating parallel circuit bolted to the frame. Resistors aren’t obsolete. They’re still the right call on plenty of older trucks and trailers with simple thermal flashers. But treating them as the default fix for every LED complaint is outdated thinking that adds heat and wiring complexity where a cleaner fix exists.
What doesn’t change, regardless of which fix you choose, is the mounting discipline. Bare metal, correct hardware, and a genuine ground check separate a repair that lasts from one that comes back on a service ticket.
— All
Sources
- Why do my blinkers hyper-flash when installing an LED bulb?
- LOAD EQUALIZER
- LED trailer light conversion: wiring to check first
FAQ
What Does It Mean When LED Turn Signals Flash Too Fast?
Hyper-flash happens when the vehicle’s flasher circuit detects lower current draw from LED bulbs than it expects from incandescent bulbs, so it speeds up the flash rate as a built-in bulb-out warning as explained by Headlight Revolution. Installing a properly sized load resistor typically restores the normal flash rate.
What Size Load Resistor Do I Need for LED Turn Signals?
Most standard 12 volt turn signal applications use a 6 ohm, 50 watt load equalizer, which is the common spec covered in Sylvania’s installation guide. Always confirm the rating against your specific vehicle or tow module wiring diagram before buying.
Do I Need One Resistor per Bulb or per Circuit?
You generally need one resistor per affected circuit, wired in parallel, rather than one per individual bulb. Installing resistors on circuits that don’t need them adds unnecessary heat and cancels out the efficiency benefits of running LEDs.
Can I Avoid Resistors With CANBUS LED Bulbs Instead?
Yes, CANBUS-compatible LED bulbs or a manufacturer-recommended module often solve hyper-flash without adding a resistor, especially on trucks with BCM or CAN bus monitoring. Compatibility varies by vehicle and model year, so check your specific tow vehicle’s documentation, as Spencer Trailers notes.
Why Does a Load Resistor Get So Hot?
A load resistor dissipates the extra electrical current it’s designed to add back into the circuit, and that dissipation generates real heat at typical 12 to 13.5 volt charging levels. That’s why manufacturer guidance requires mounting it to bare metal, away from wiring harnesses and combustible trim.
